Roman blinds sewing instructions

Description
Do the standard measurements not fit your windows, or can you never find your favourite pattern in the blind department? Then take to your sewing machine because it’s time to DIY. With our sewing tutorial for simple Roman blinds, you’ll whip up a unique piece for your window in a jiffy without needing much sewing experience. They will be especially effective at blocking out sunlight when you use one of our many black-out fabrics.
You'll Need:
You'll also need 2 eyebolts and 2 wooden battens of a suitable thickness from the DIY store.
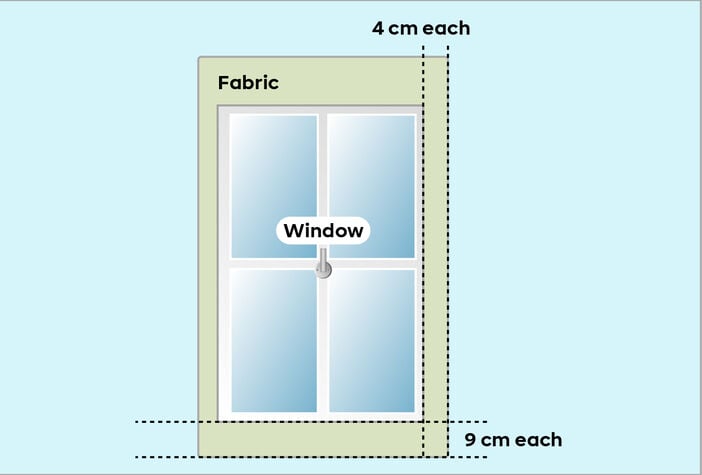
Cut fabric
If your fabric needs cutting to size, measure your window and cut your fabric as follows: window length plus 18cm, window width plus 8cm.
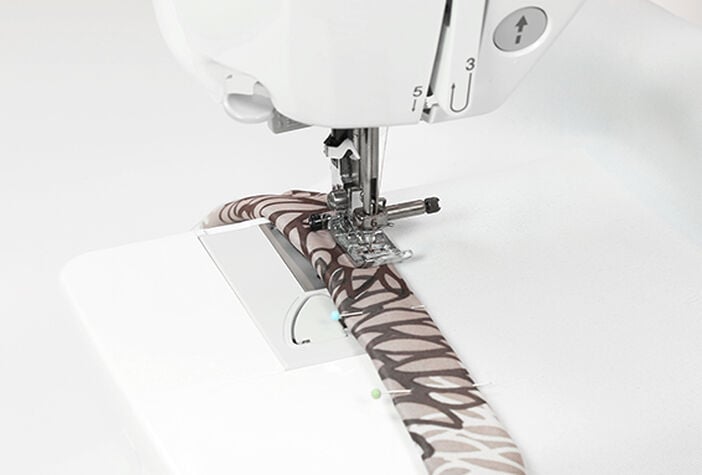
Sew side edges
Fold the edges along the length of the fabric towards the inside by 4cm - it’s best to do this twice - and secure with a straight stitch (or a decorative stitch).
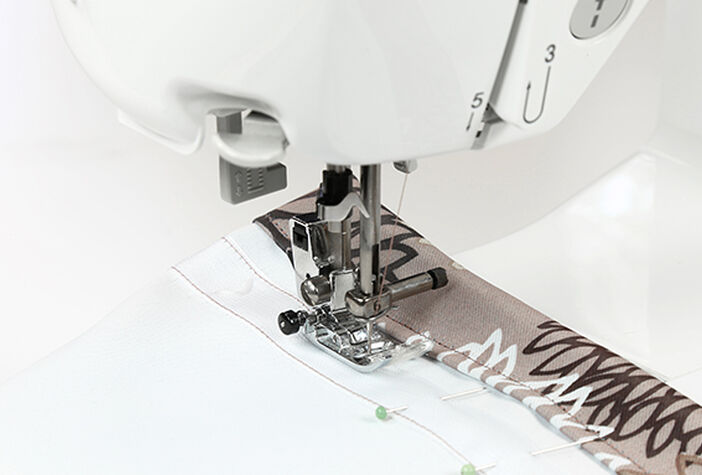
Sew the blind tape
Sew the blind tape to the back of the blind. You should position it around 2-4cm from the long side seam, depending on the width of your blind.
Tip: if your blind is very wide, it may make sense to add a third row of blind tape in the centre. This will increase the length of your drawstring.
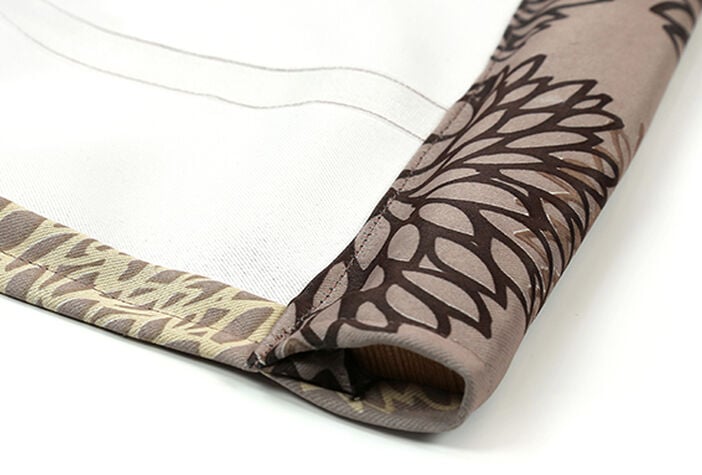
Create top edge
Create a neat tunnel for the narrow wooden rod at one short end, creating the top of the blind. Secure the tunnel with a line of stitching.
Important: to make sure the fabric doesn’t shift later on, the tunnel should be sewn precisely so that the fabric is taut around the wood..
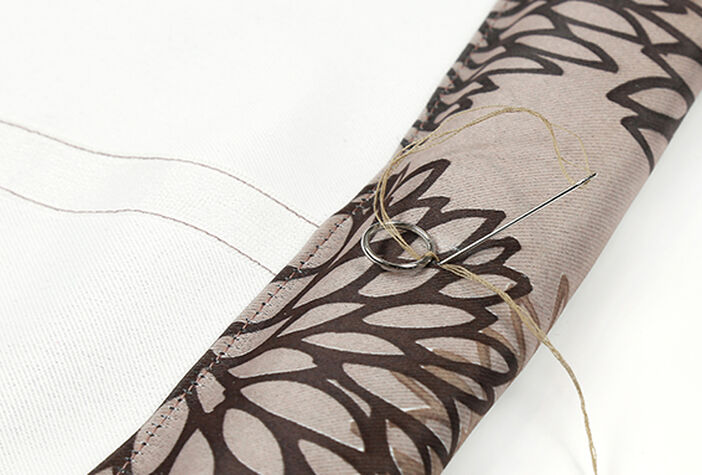
Eyelets
To the left and right above the blind tape, securely hand-sew an eyelet onto the tunnel using doubled-up thread.
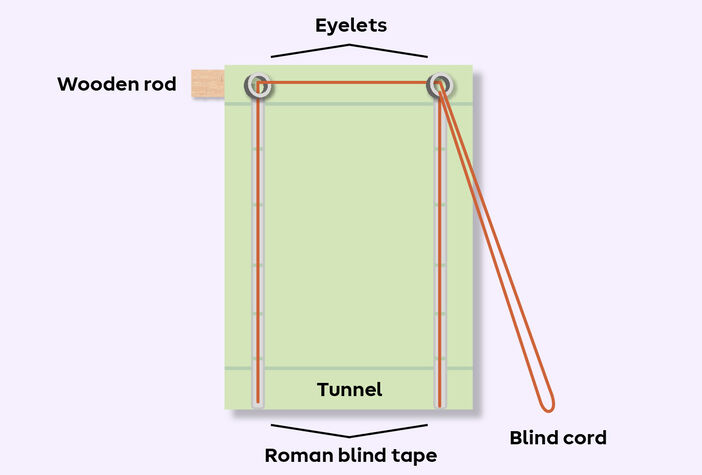
Thread cord
Pull the cord through the top eyelet (see illustration) and then thread the cord through the open ends to the left and right of the blind. The ends of the cord should be pulled through around 10cm above the bottom fabric edge.
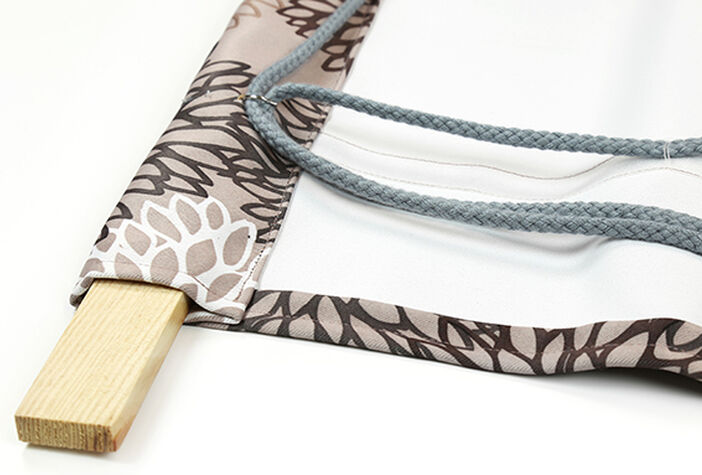
Position wooden rod
Push the wooden rod into the top tunnel.
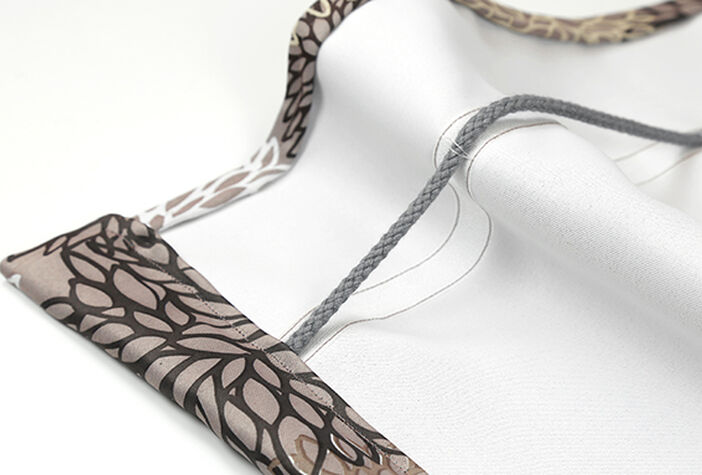
Secure cord at bottom of blind
As you create another tunnel at the bottom of the blind, the ends of the cord should be secured in the line of stitching at the left and right, attaching them to the bottom edge of the blind. Slide the bottom wooden rod into the tunnel. Now pull on the cord to check your Roman blind works.
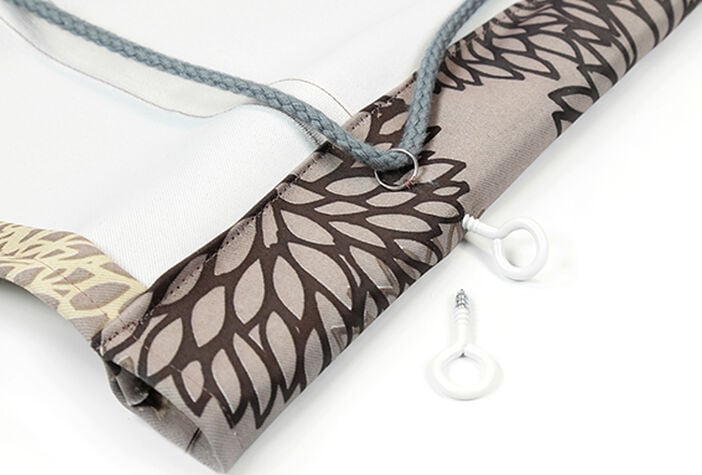
Attach hangers
Screw the ring screws into the wood through the fabric just above the eyelets. Use a pair of scissors to carefully make a small hole first. You can now hang your blind from the ring screws.
Tip: if you would rather hang your blind from an existing curtain rail, sew the upper fabric tunnel to snugly fit onto the rail to avoid any fabric slippage.


